A header filter report is a report where the filter selection is made in the column header instead of in the filter menu.
To accomplish this start with the following:
Make sure you have imported the “headerfilter” plugin and that it is set to active.
For every header filter make a new Filter report. In this example I have created 3 FilterReportSenario1, FilterReportSenario2 and FilterReportSenario3. Make sure they have a preselected member then save and publish
Create a new report. Fill out all the necessary report data except for column axis.
Add the filters to the report. Uncheck the “Allow multiple” for each filter.
For each filter create a dynamic value and select the current filter in “Use filter value”

Also create a declared member for each filter and use the dynamic value in the formula field. Remember to alias it under the same dimension as the filter. In this case [TimeFunction]
Then drag the declared member to the column axis of the report.

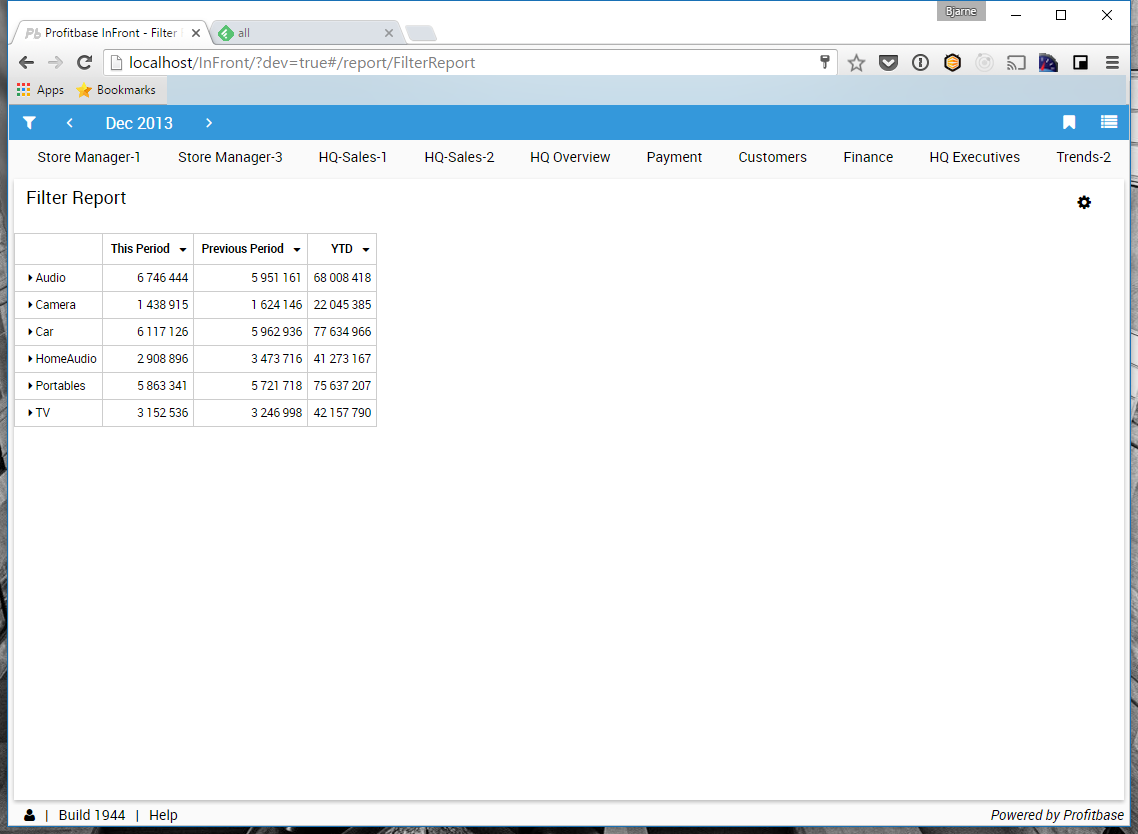
If you preview it in the designer the preview will fail because the filters do not have any selected members. If you view it in a web browser, you will see that the report is working.

Now for each of the members on the column axis. Input“<headerfilter filterid='<<name of filter>>’/> to the header plugin field, example: <headerfilter filterid=’FilterReportSenario1’/>.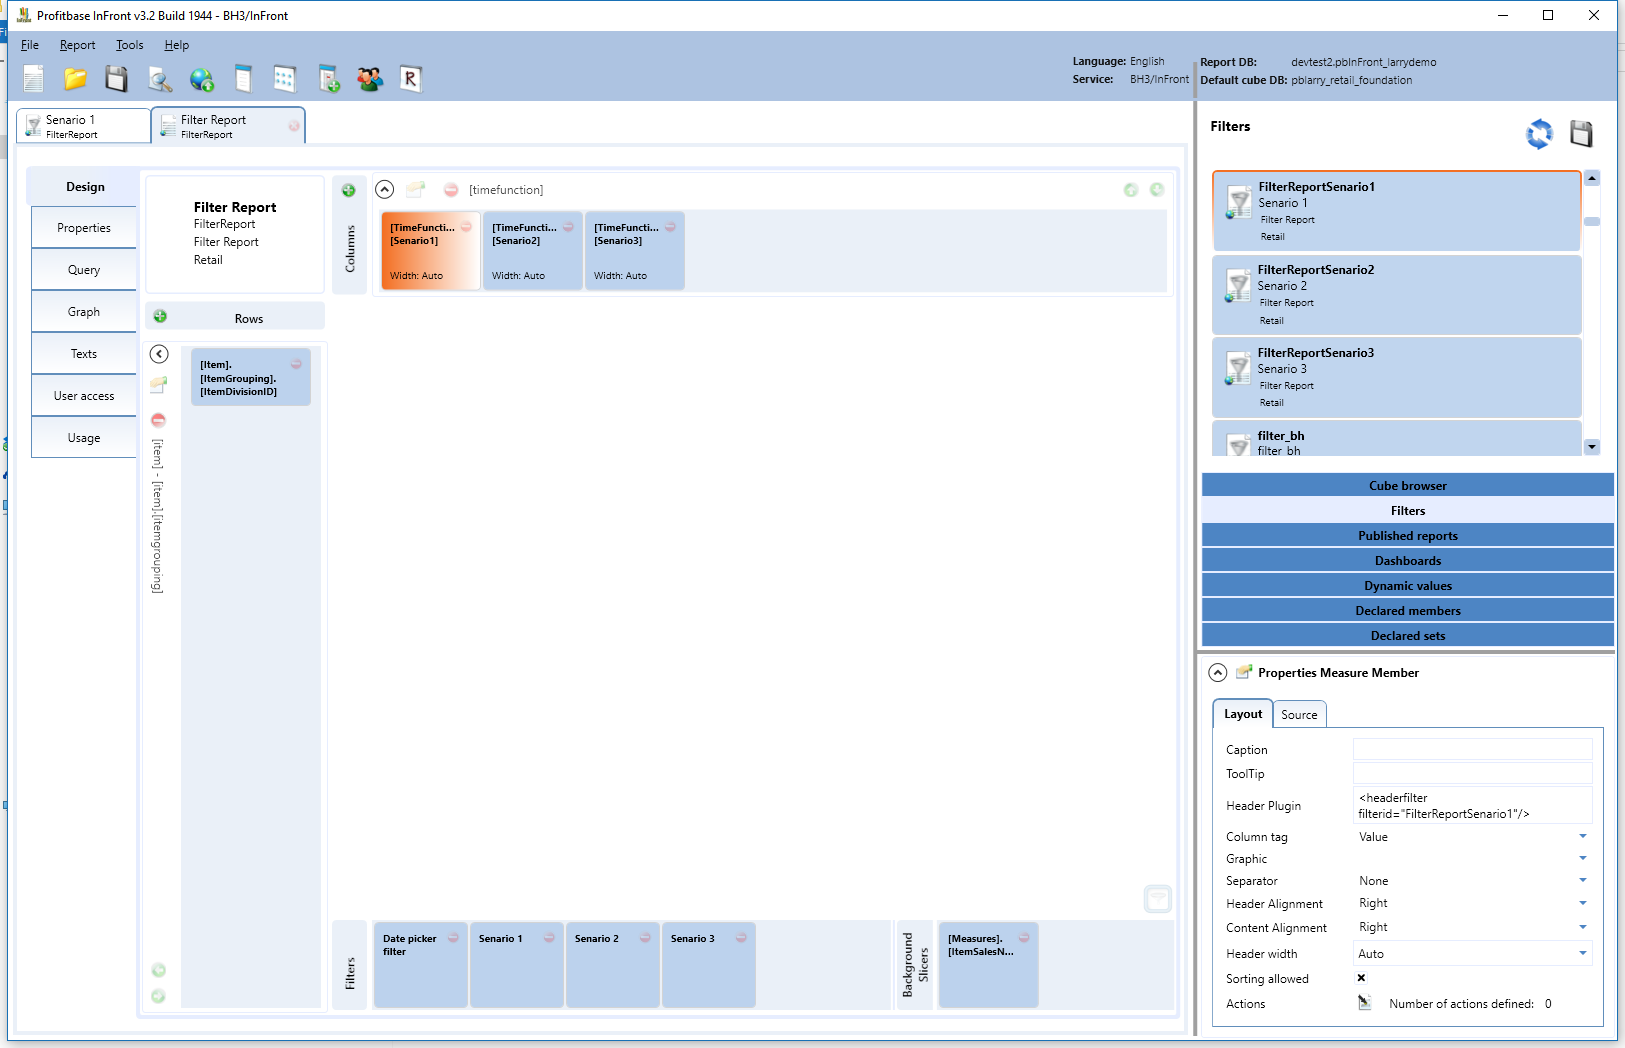
There is an option to not auto apply when selecting a filter member from the dropdown. Just add the attribute autoload=’false’, example: <headerfilter filterid=’FilterReportSenario1′ autoload=’false’ />. The default is true.
The current report will now look like this.

Last thing to do is to hide the filters from the toolbar. Click on each of the filters in the report designer and check the hidden field. Save and publish.
The final report
Advanced topic: Control multiple filters per column
Create filter reports for the additional filters following the same procedure as above.
Add them to the report. Remember to uncheck “Allow multiple” and check “Hidden”.
Create “Dynamic values” for the filters.
Modify the declared members to include the new filters. Example: (<<SENARIO1>>,<<RETAILSTORE1>>)
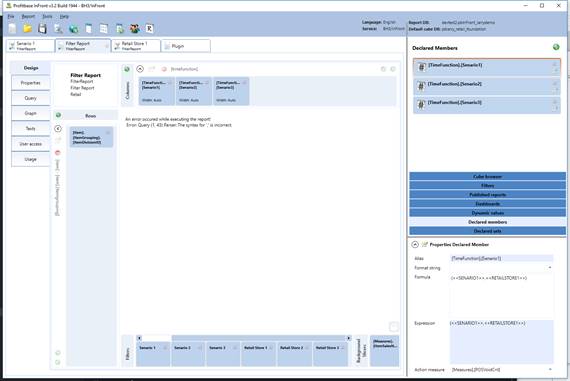
Finally modify the header plugin for the columns. Change “headerfilter” to “headerfilters” and the “filterid” to “filterids”. Add the filters for each column as a comma separated list. Example: <headerfilters filterids=’FilterReportSenario1,FilterReportRetailStore1’/>

The final report
